LogiX Tooltip
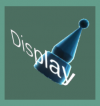
The LogiX Tooltip is a tooltip that allows you to work with the Neos' visual programming system, creating and modifying nodes and making connections between them.
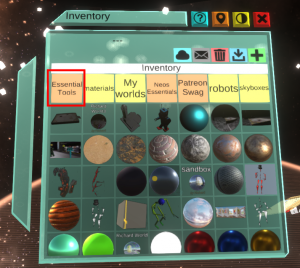
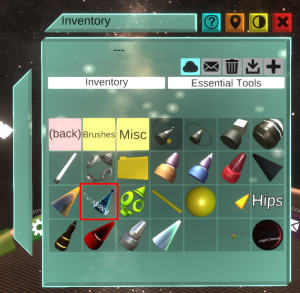
The display tooltip is found by clicking: Inventory > Essential Tools > Display
Using the tooltip
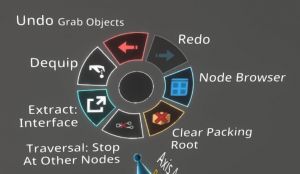
- Undo: Undoes the previous action (steps back one in history).
- Redo: Redoes the previous undone action (moves forward one in history).
- Dequip: Dequips the tooltip. Since only one tooltip at a time can be equipped in one hand, equipping a different tooltip automatically dequips this tooltip.
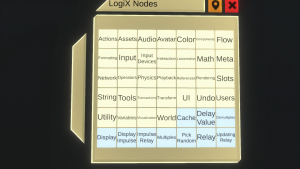
- Node Browser: Pulls up the LogiX node menu, where LogiX nodes can be instantiated.
- Extract: Sets the tooltip to extract mode. Clicking this item will change the extraction mode:
- Interface: Extracts the interface node of grabbed object.
- Drive Node: Extracts a node which drives the grabbed property. May also extract a node containing the value of the property at the time the drive node was created, and connected to the driver node.
- Reference Node: Extracts a node which is a reference to the grabbed property. May also extract a node dereferencing the reference and displaying it. (TODO: this is an assumption, check if this is correct)
- Traversal: Sets the traversal mode when packing LogiX into an object. Clicking this item will change the traversal mode:
- Break at other nodes: Stops packing at other nodes (in the output direction?).
- Complete: Packs all connected nodes.
- Clear Packing Root: Clears any set packing root object.
When an object (or its equivalent in the Scene Inspector) is grabbed and the context menu button is pressed, the menu changes:
- Set Packing Root: Sets the object as the container for any subsequently packed LogiX.
- Unpack Children and Connected Nodes: Shows all LogiX for the object and its children.
Instantiating a LogiX node from the Node Browser
After bringing up a node browser, navigate using double-clicks until you find the node you want to instantiate. Double-click on it, and the name of the node will be loaded into the tooltip. Now point somewhere outside the browser and double-click. The node will be instantiated.
Connecting nodes
Point the laser of the tooltip at an input or output of a node and click and hold. Drag the connection out to where you want the connection to go. The connection end will snap to various points. Release when the connection end snaps to where you want it to go.
Helpful hints
- If the connection started from an output, you can instantiate a display node with a secondary click while dragging. If the connection started from an input, you can instantiate an input node with a secondary click while dragging.
- A non-impulse input can only have a single connection. If you connect something to an input that already has a connection, the old connection will disappear and the new connection will be made.
- An impulse input can have more than one connection. The effect is that the input is triggered by any of the input impulses.
- An non-impulse output can source multiple connections.
- An impulse output cannot go to more than one input. If you need an impulse to trigger multiple things, you will have to order them by chaining nodes or using the Sequence node.
- You can secondary click on any node to copy its' logiX component onto your logiX tip.
Disconnecting nodes
Click and hold above the connection you want to break. Drag, and a red line will appear. Drag so that the red line intersects the connection. The connection will turn red. When you let go, the connection will be removed.
Extracting an object's interface as a LogiX node
To extract the interface for an object, use the Developer Tooltip to pull up its inspector. Switch to the LogiX tooltip, hit the context menu button, and change the extract mode to Interface. Next, in the inspector, point at the object in the hierarchy you want to extract the interface from. Grab it, which will give you a blue reference above the tooltip. Briefly press the secondary button, and a LogiX node for the object's interface should appear.
Tutorial
updated
This article or section is a Stub. You can help the Neos Wiki by expanding it.
